

How To Change Battery In Dell Inspiron 1545
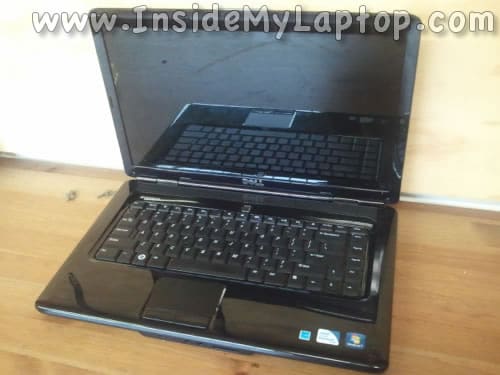
Today I am presenting a complete disassembly guide for Dell Inspiron 1545.
My goal is removing and replacing the DC jack board and cleaning the cooling fan which is mounted under the motherboard.
Keep track of all removed screws. Make notes where they go. It will help you a lot during the reassembly process.
Before you start taking it apart, make sure the laptop is turned off.
STEP 1.
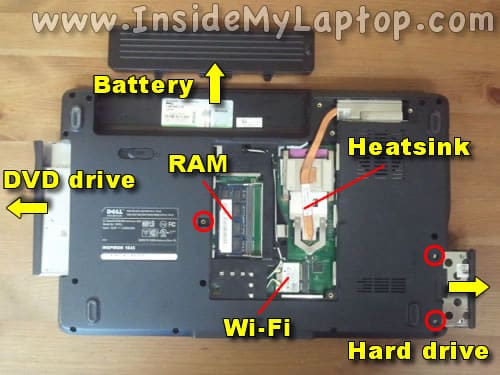
As always, start disassembly process with removing the battery.
New replacement batteries available here.
On the bottom of the laptop remove screws securing the service cover and remove the cover.
Under the cover you can access both memory (RAM) slots, wireless card and heatsink. I will show how to remove the heatsink in the step 14.
Remove one screw securing the DVD drive. Pull the DVD to the left and remove it.
Remove two screws securing the hard drive. Pull the hard drive to the right and remove it.
Upgrading regular 2.5″ SATA hard drive to a 2.5″ SATA solid state drive will improve laptop performance significantly.
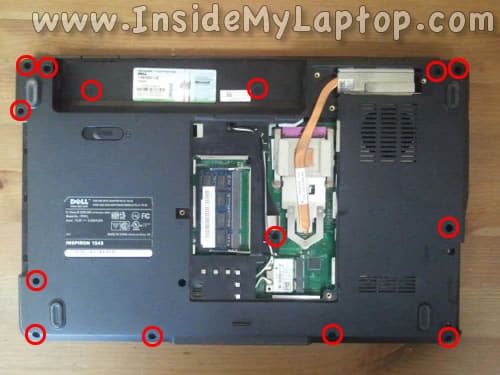
STEP 2.
Remove all screws from the bottom.
STEP 3.
Remove the center control cover.
Remove two screws securing the keyboard. Remove the keyboard.
In one of my previous guides I explained how to remove the keyboard from a Dell Inspiron 1545 in greater detail.
Refer to that guide for removing the keyboard.

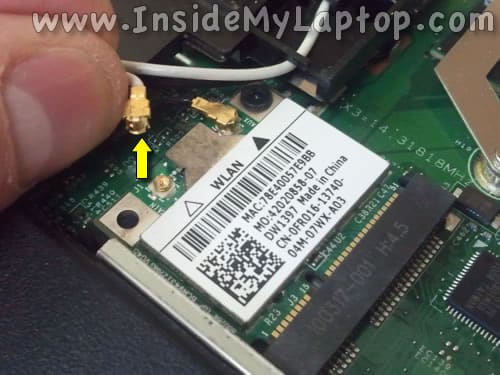
STEP 4.
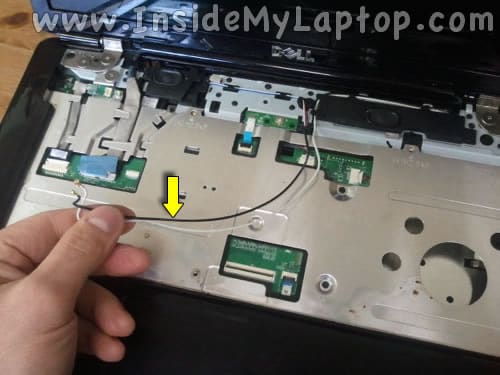
Disconnect both antenna cables from the wireless card.
Simply grab the antenna cable by the gold connector and pull it up.
STEP 5.
Pull both antenna cables though the opening in the top cover and un-route them from the top cover.
STEP 6.
Remove six screws securing the display hinges.
Unplug the Bluetooth cable and LCD screen cable from the motherboard.
Here's how to unplug the Bluetooth module cable.
Remove the Bluetooth module.
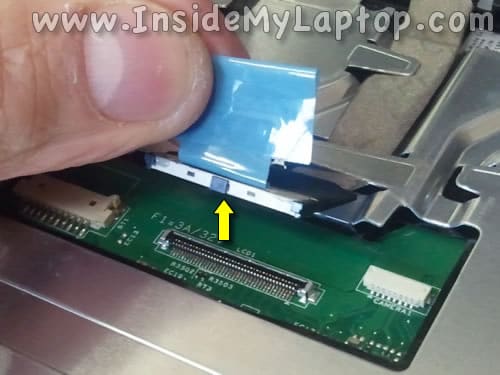
Here's how to disconnect the LCD screen cable. Pull the connector up by the blue tab and unplug it from the motherboard.
STEP 7.
Lift up and remove the display panel.
In one of the previous guides I explained how to remove the LCD screen from the display panel.
Refer to that guide for removing and replacing the LCD screen.

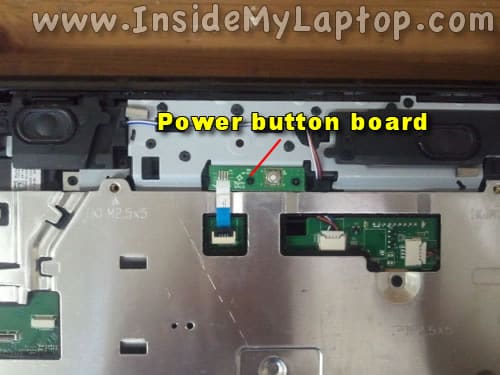
STEP 8.
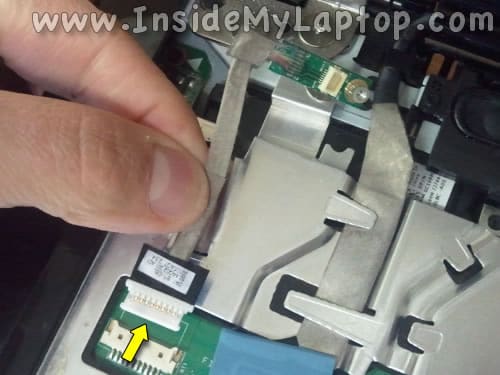
Now we'll have to disconnect and remove the power button board.
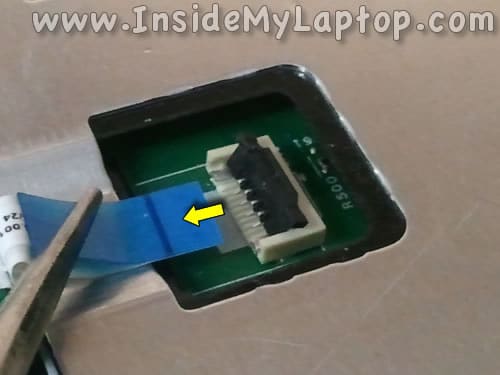
Before you remove the power button board, you'll have to unlock the connector and release the cable.
Here's how to unlock the connector. Lift up the cable retainer with your fingernail.
The retainer will open up at a 90 degree angle.
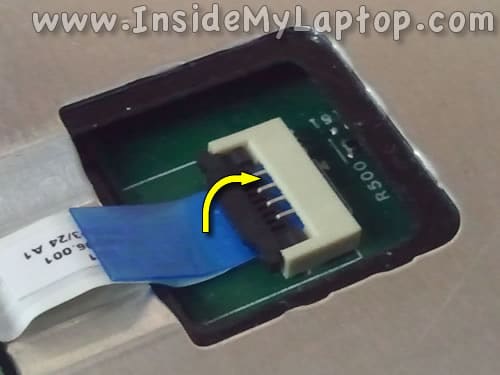
On the following picture the connector shown in the unlocked position.
Now you can pull the cable from the connector.
STEP 9.
Remove the power button board.
By the way, if your laptop stopped turning on when you push on the power button it's possible that replacing this board will fix the issue.

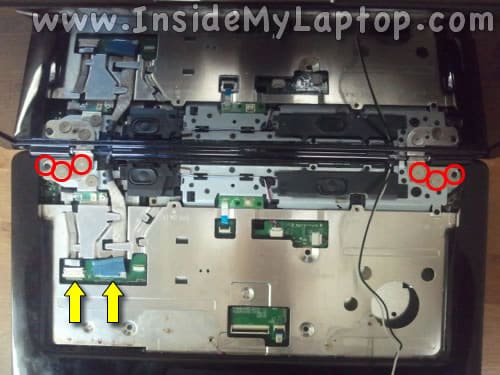
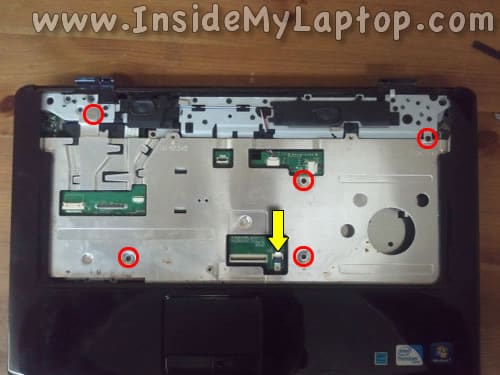
STEP 10.
Remove screws securing the top cover (palm rest) assembly.
Disconnect the trackpad cable from the motherboard. Use same technique as for disconnecting the power button board cable.
STEP 11.
Separate the top cover (palm rest) assembly from the bottom case and remove it.

STEP 12.
Now we are going to remove the express card bus board.

Remove three screws securing the express card bus board.

STEP 13.
Lift up the express card bus board to disconnect it from the motherboard and remove it.

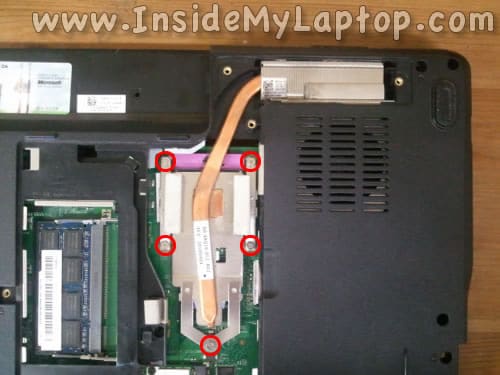
STEP 14.
Loosen five screws securing the heat sink assembly.
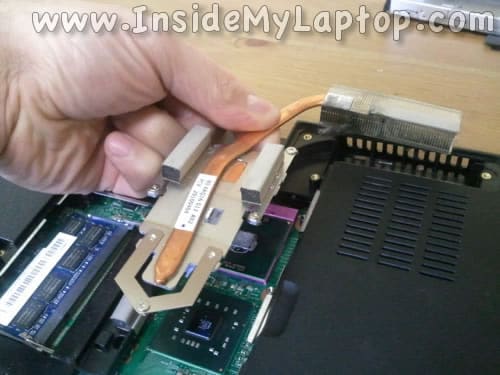
STEP 15.
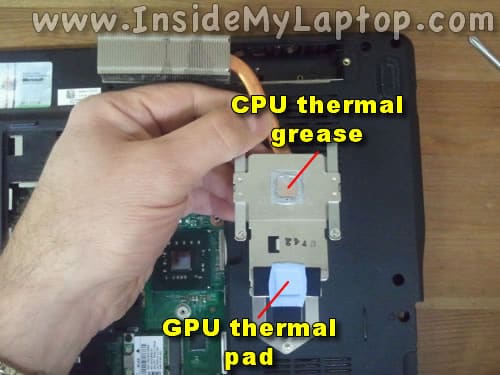
Carefully lift up the heat sink and separate it from the CPU and GPU chips.
When you turn the heat sink over, you'll see the area that covers the CPU has thermal grease on it and area that covers the GPU has thermal pad.
You'll have to reapply thermal grease before installing the heat sink back in place. Do not touch the thermal pad, you can reuse it.
In one of my previous posts you'll find more detailed instructions about applying thermal grease on the CPU.
STEP 16.
Remove screws securing the motherboard.
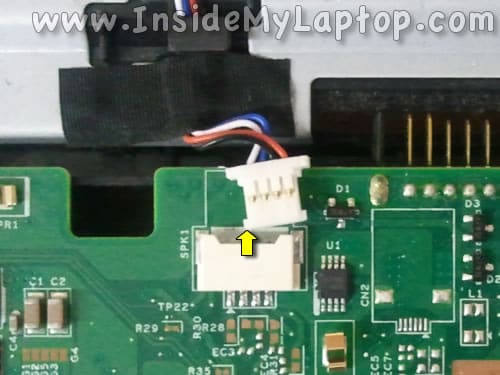
Disconnect three cables from the motherboard.
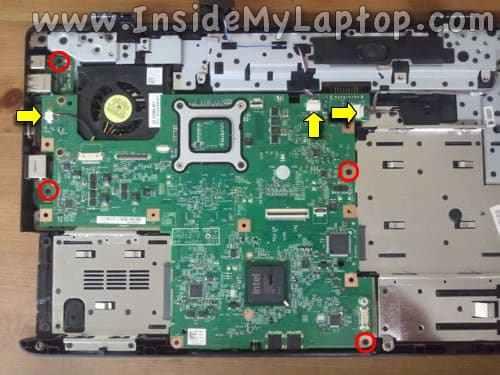
Simply unplug cable connectors as it shown on the following picture.
STEP 17.
Lift up the motherboard on the right side and start removing it.
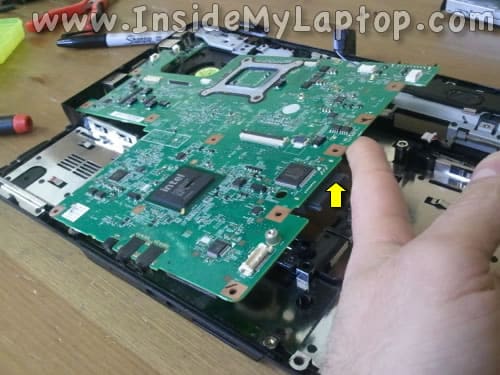
STEP 18.
Remove the motherboard.
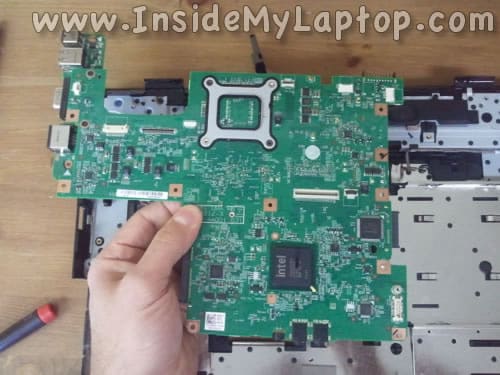
In a Dell Inspiron 1545 the DC power jack attached to a separate board.
By the way, the CMOS battery also can be accessed on the bottom side of the motherboard.

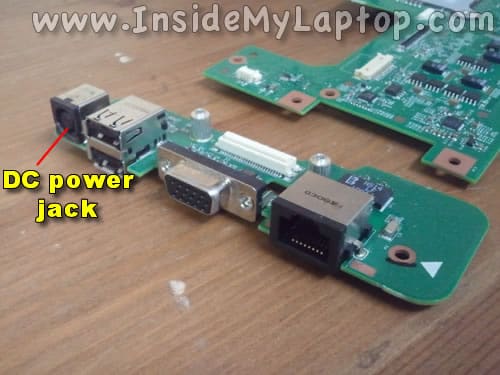
STEP 19.
Remove two screws securing the DC power jack.

STEP 20.
Separate the DC power jack from the motherboard. Now it's ready to be replaced.
If you have a failed DC jack, it's easier to replace the entire power jack board than re-solder just the DC jack.
STEP 21.
The cooling fan attached to the bottom case.
You can access and remove the fan only when the motherboard removed.
In order to remove the fan you'll have to remove two screws.

STEP 22.
Finally, remove the cooling fan.
Now the fan is ready to be replaced.

How To Change Battery In Dell Inspiron 1545
Source: https://www.insidemylaptop.com/complete-disassembly-guide-for-dell-inspiron-1545-laptop/
Posted by: sprattarallier.blogspot.com
0 Response to "How To Change Battery In Dell Inspiron 1545"
Post a Comment